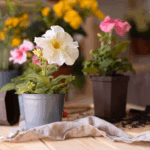
Quick essentials (what you’ll need)
- Compact/dwarf tomato variety (see suggestions below)
- Pots: 2–3 gal for dwarf; 3–5 gal for patio/ determinate; 7+ gal for larger or indeterminate types
- Quality potting mix (not garden soil) + perlite or coco coir
- Full-spectrum LED grow light (or a very sunny south window)
- Small oscillating fan for air movement
- Stakes, small cage or tomato clips
- Balanced fertilizer and a bloom feed (liquid or granular)
- Thermometer, watering can, pruning shears, small paintbrush (for pollination)

Step 1 — Choose the right variety
Indoor space and light usually limit you to compact types:
- True dwarfs / micro: Micro Tom, Tiny Tim, Red Robin
- Patio / determinate: Patio Princess, Celebrity
- Small cherry types: Sungold, Sweet Million (good flavor, high yield)
(Indeterminate “vine” varieties can work but require larger pots, stronger lights, and more support.)
Step 2 — Start seeds or buy seedlings
From seed:
- Sow indoors 6–8 weeks before your planned transplant date.
- Use a light seed-starting mix; sow ~1/4″ deep.
- Keep at 70–80°F (21–27°C) for fast germination (5–10 days).
- Provide 14–18 hours of bright light once seedlings emerge.
Buy seedlings if you want a faster start — choose short, stocky plants, not leggy ones.
Step 3 — Potting & soil mix
- Pot size: 2–3 gal for true dwarfs; 3–5 gal for patio/determinate; 7+ gal for indeterminate.
- Soil mix: 60% high-quality potting mix + 25% perlite + 15% compost or well-rotted manure (or 60% potting mix, 30% coco coir, 10% perlite).
- Ensure pots have good drainage holes.
Plant deeply: bury stems up to the first set of true leaves — tomatoes root along buried stem and develop stronger root systems.
Step 4 — Light: give them plenty
Light is the most critical factor indoors. Window light usually isn’t enough unless you have a very sunny south exposure.
- Grow light: Full-spectrum LED recommended.
- Hours: 14–18 hours per day while growing/fruiting.
- Distance: Follow fixture guidance; typical LED distance ~12–24″ above canopy.
- Rotate pots so light is even on all sides.
Step 5 — Temperature & airflow
- Day: 70–78°F (21–26°C)
- Night: 60–65°F (15–18°C)
- Humidity: 40–60% is ideal.
- Use a small fan to create gentle airflow — helps prevent disease and assists pollination.
Step 6 — Watering correctly
- Water deeply and consistently — allow top 1–2″ of soil to dry before watering again.
- Water until excess drains from the pot. Avoid waterlogging.
- Mulch the surface to reduce evaporation and maintain steady moisture.
Consistent moisture helps prevent blossom end rot (a calcium-related disorder often exacerbated by irregular watering).
Step 7 — Fertilize on schedule
- At transplant: mix in a slow-release balanced fertilizer or some compost.
- During vegetative growth: liquid feed every 1–2 weeks or granular per label (balanced N-P-K, e.g., 10-10-10).
- When flowers set: switch to a bloom/fruit feed higher in P and K (e.g., 5-10-10) to support fruiting.
- Don’t over-fertilize nitrogen — too much N → lots of leaves, few fruits.
Step 8 — Support & pruning
- Place a stake or small cage at planting time.
- Determinate (bush) types: minimal pruning.
- Indeterminate (vine) types: remove suckers (side shoots between stem & branch) to focus energy on fruit; keep one or two main stems.
- Remove yellowing leaves and any diseased foliage promptly.
Step 9 — Pollination indoors
Indoors you need to help pollination because there are no bees:
- Gently shake flower clusters daily, or
- Use an electric toothbrush or small paintbrush to transfer pollen among flowers, or
- Run a small fan near blooms for a few hours daily to mimic wind.
Proper pollination improves fruit set.
Step 10 — Common pests & disease prevention
- Watch for aphids, whiteflies, spider mites — treat early with insecticidal soap or neem oil.
- Prevent fungal disease by ensuring good air circulation, avoiding overhead watering, and not crowding plants.
- Use sterile potting mix and clean containers to reduce soil-borne pathogens.
Step 11 — Harvesting
- Harvest when fruit reaches full color and gives slightly to touch.
- For best flavor, let fruit ripen on the vine; if an overabundance occurs you can pick slightly underripe and finish at room temperature.
- Store tomatoes at room temp — refrigeration can mute flavor.
Troubleshooting — quick fixes
- Leggy seedlings → insufficient light. Move closer to grow light or increase hours.
- Yellow lower leaves → overwatering or poor drainage. Check roots and reduce water.
- Blossom drop → extremes of temperature, poor pollination, or low humidity. Stabilize temps and hand-pollinate.
- Blossom end rot (dark sunken bottom) → inconsistent watering or calcium deficiency. Keep moisture even; add calcium source if needed.
- Poor fruit set → not enough light or pollination; increase light and hand-pollinate.
Timeline (typical)
- Germination (seeds): 5–10 days
- Seedling to transplant: 4–6 weeks
- Flowering: ~6–10 weeks after transplant (varies)
- First harvest: 60–100+ days from transplant depending on cultivar
Quick shopping checklist
- Seeds or seedlings (Micro Tom, Tiny Tim, Sungold, Patio Princess)
- Pots (2–7+ gal depending on variety)
- Quality potting mix + perlite or coco coir
- Full-spectrum LED grow light
- Small fan, stakes/cage
- Balanced fertilizer + bloom feed
- pH test kit (optional), watering can, pruning shears
Growing tomatoes indoors is totally doable — start with one or two compact plants, give them strong light, consistent water, and good airflow, and you’ll be harvesting sweet homegrown tomatoes in a few months.